| You will need an Apple Developer Account to successfully make an Apple Pass Type Certificate. |
To use your own certificate for sending Apple Passes using Airship, you will first need to create and upload your own Apple Pass Type certificate to the Airship Wallet dashboard.
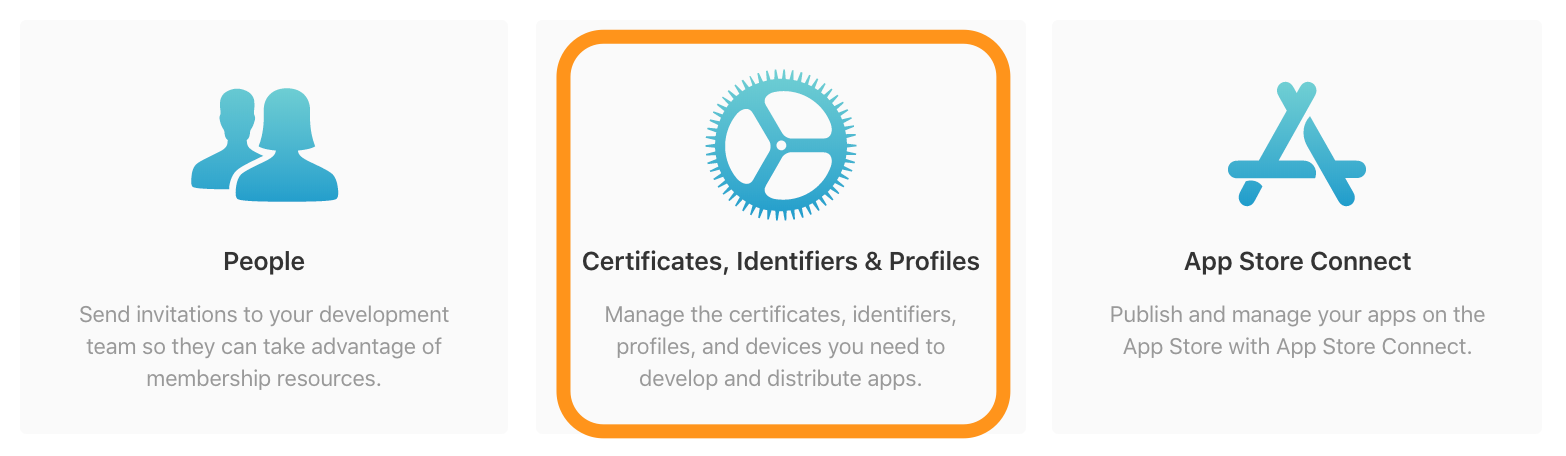
1. Log into your Apple Developer Console and select Certificates, Identifiers & Profiles.
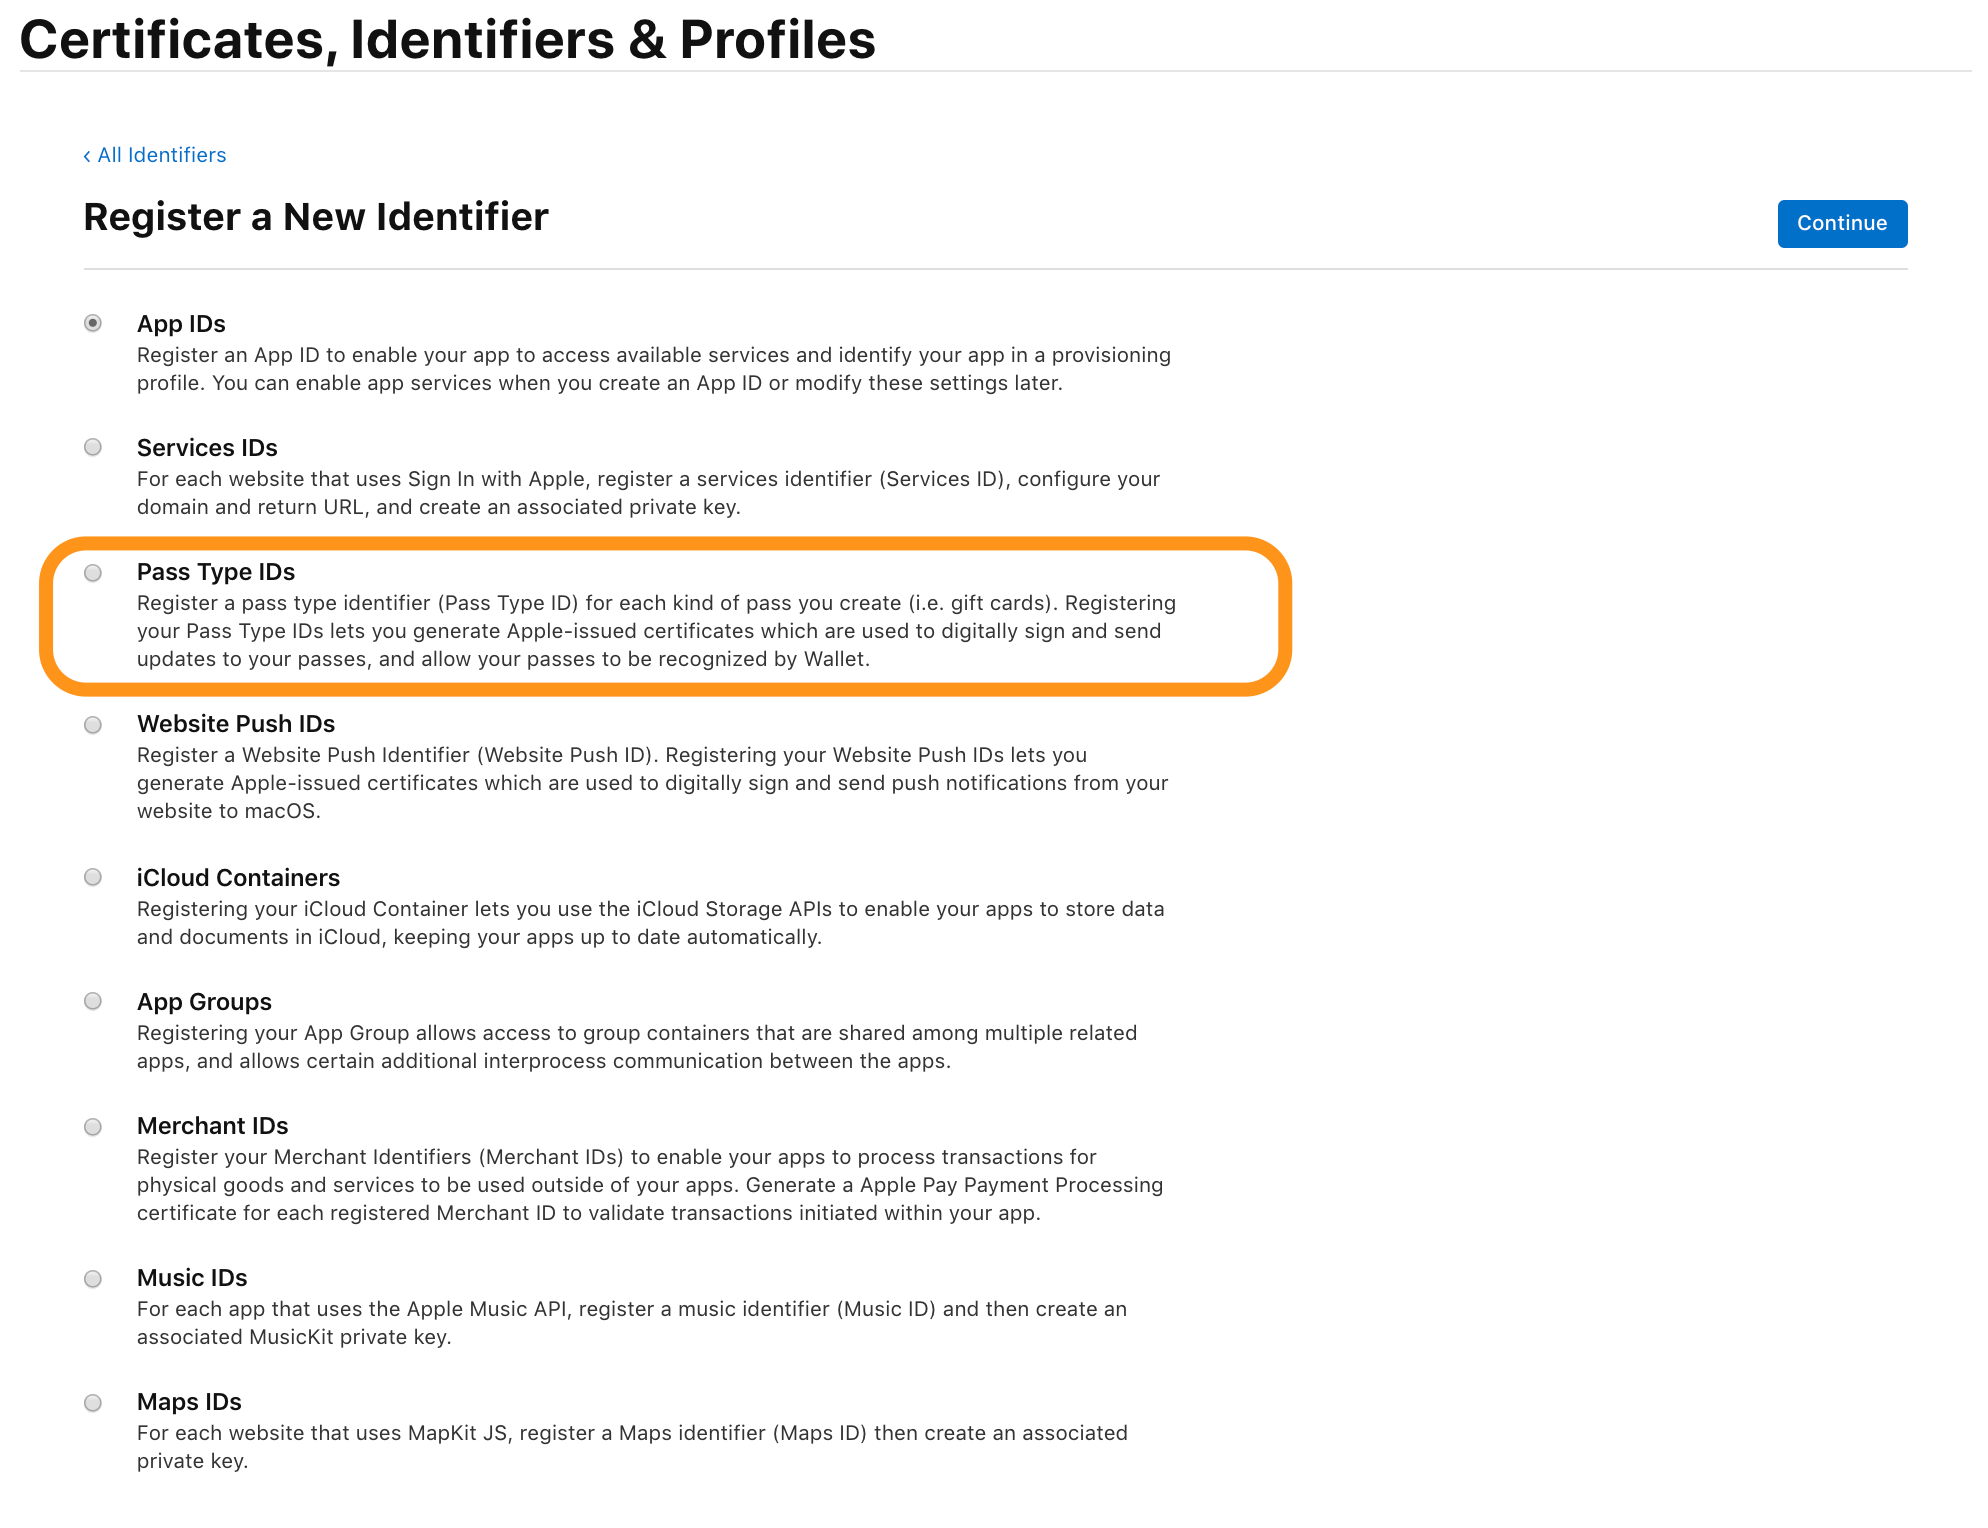
2. Select Identifiers from the menu on the left, and then specify the identifier as Pass Type IDs.
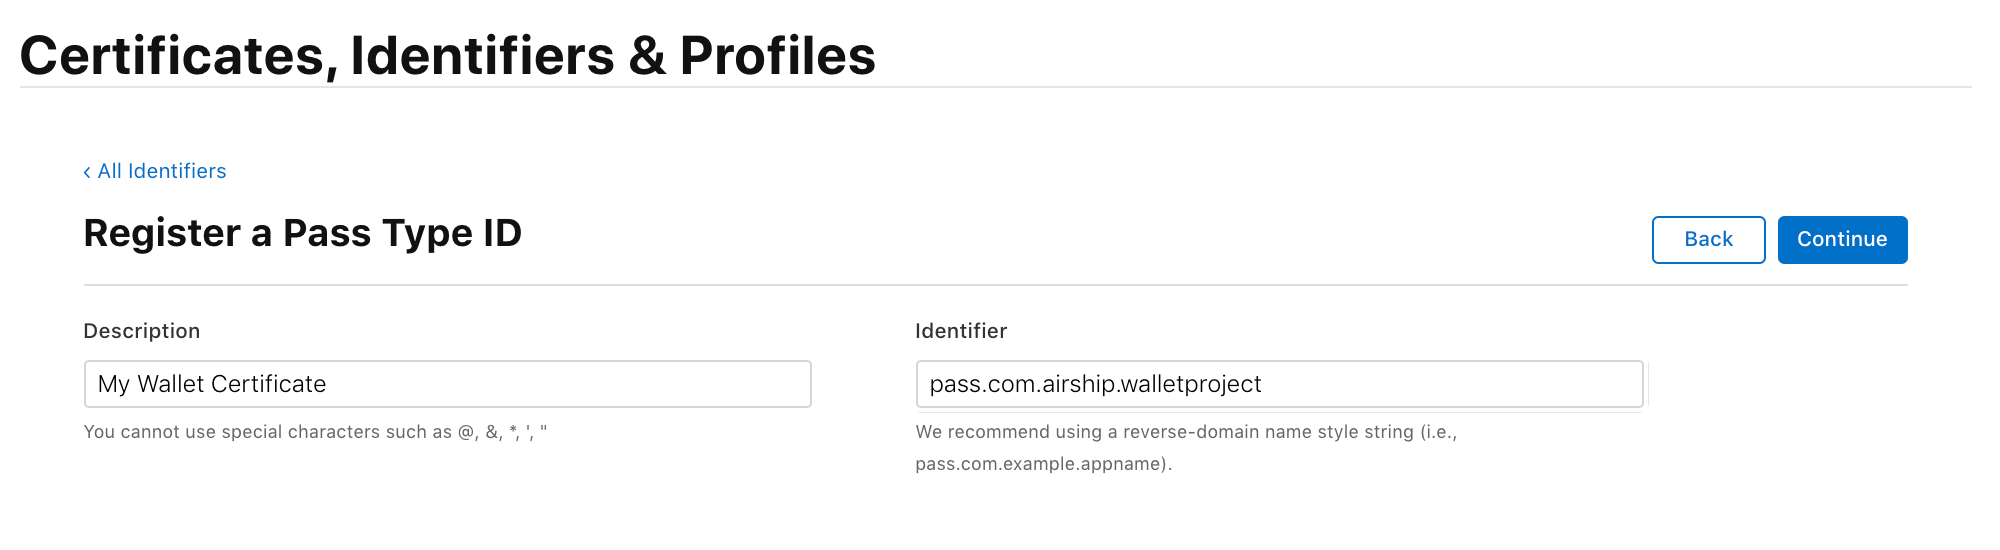
3. Fill in the Pass Type ID Description field and give your ID a unique identifier.
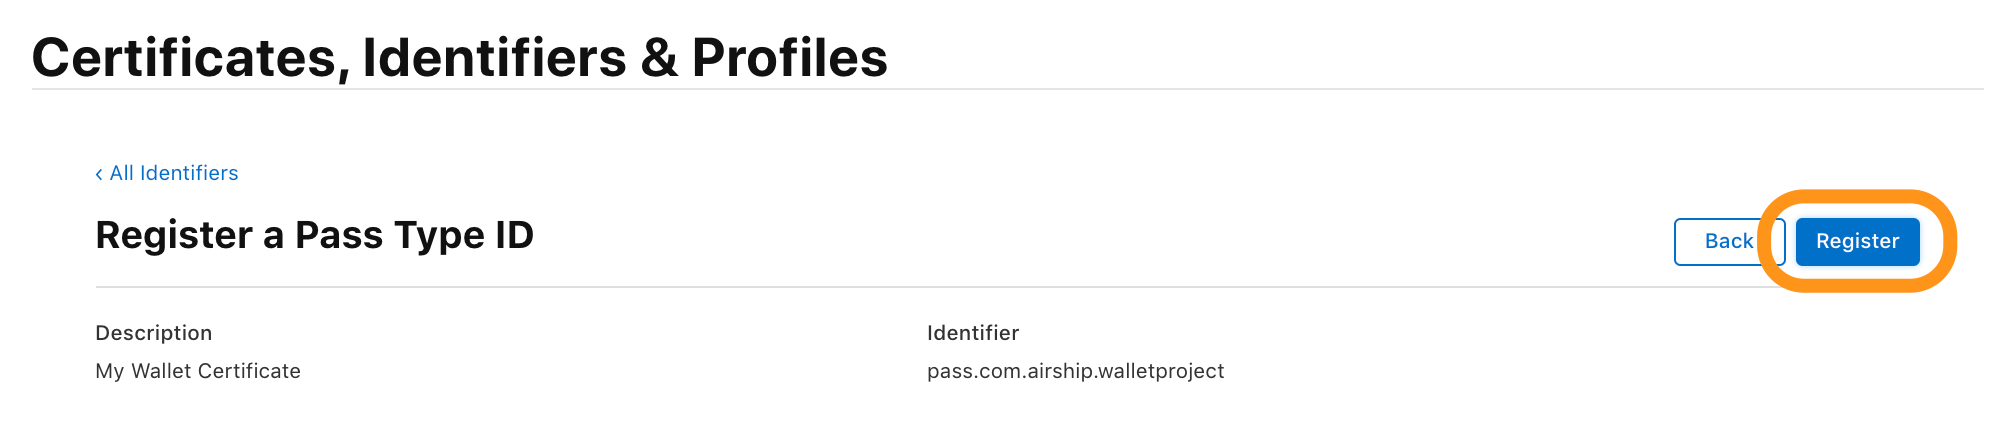
4. Verify your name and identifier then register your Pass Type ID.
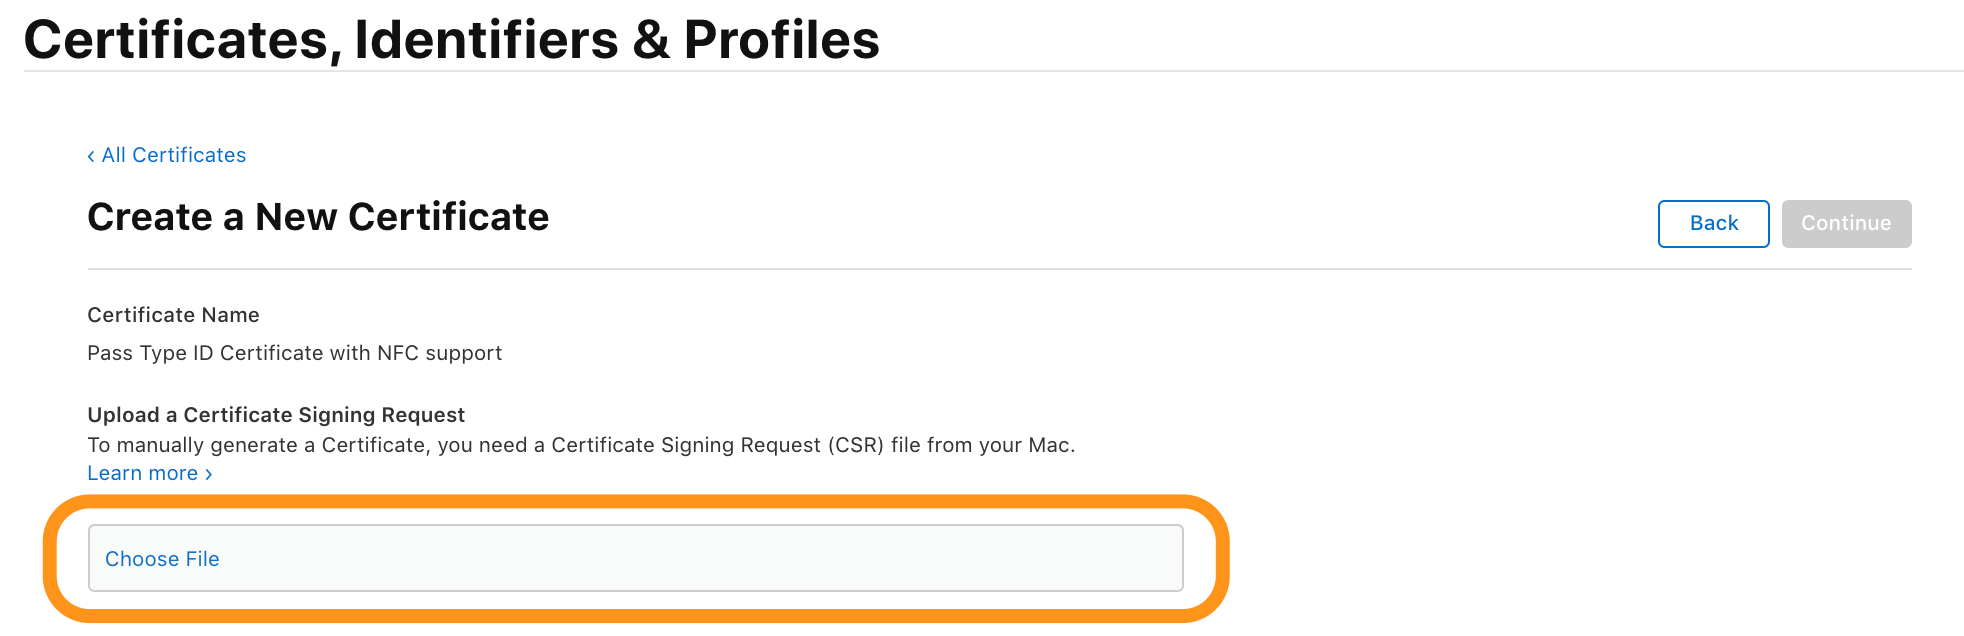
5. Select Select Certificate on your newly made iOS Pass Type ID.

6. Follow the steps outlined in this article: Create a certificate signing request, then upload the certificate by selecting Choose File.
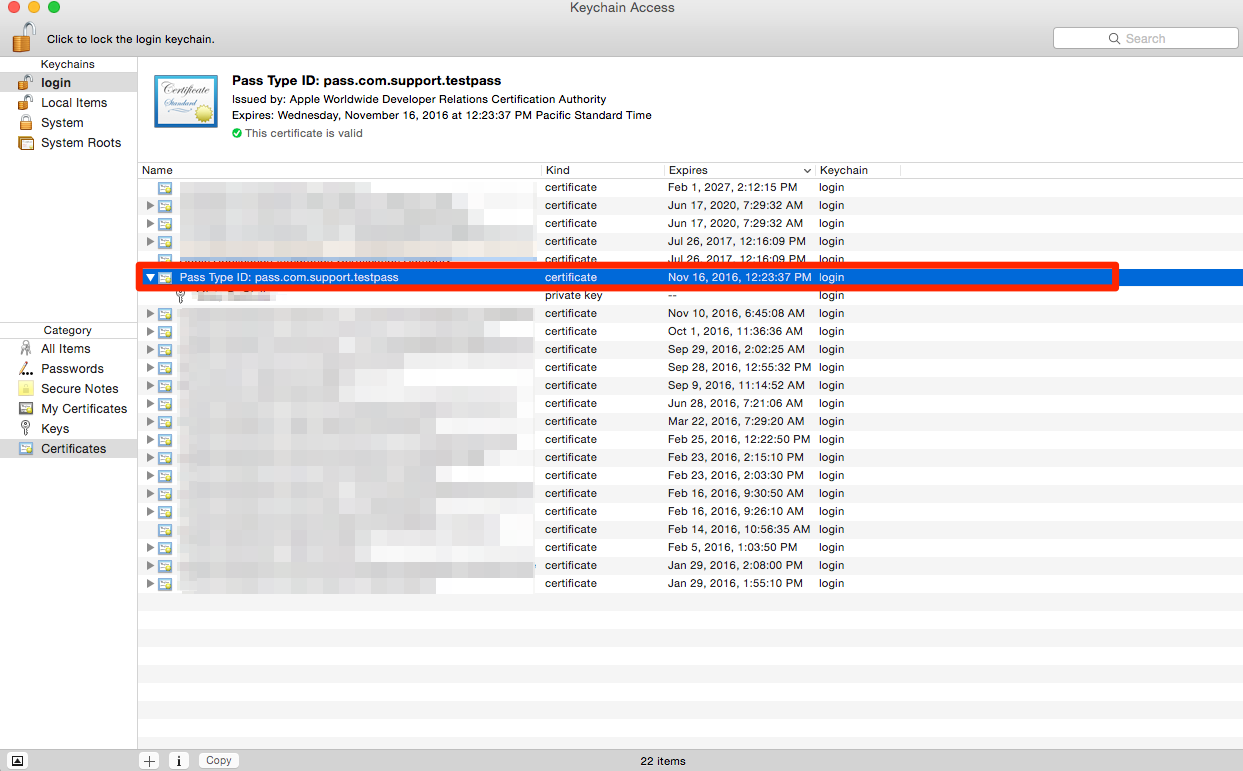
7. Download your new certificate. Double click to add this certificate to your Keychain. Right-click your certificate inside Keychain Access to export to a .p12 file.
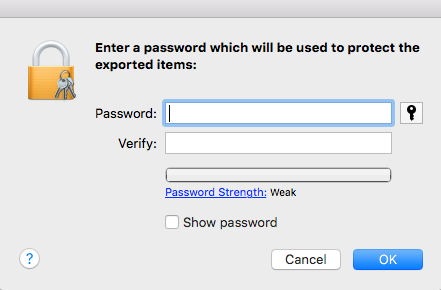
8. Add a password to your certificate. You will need to remember this password when you upload the .p12 file to the Wallet Dashboard.
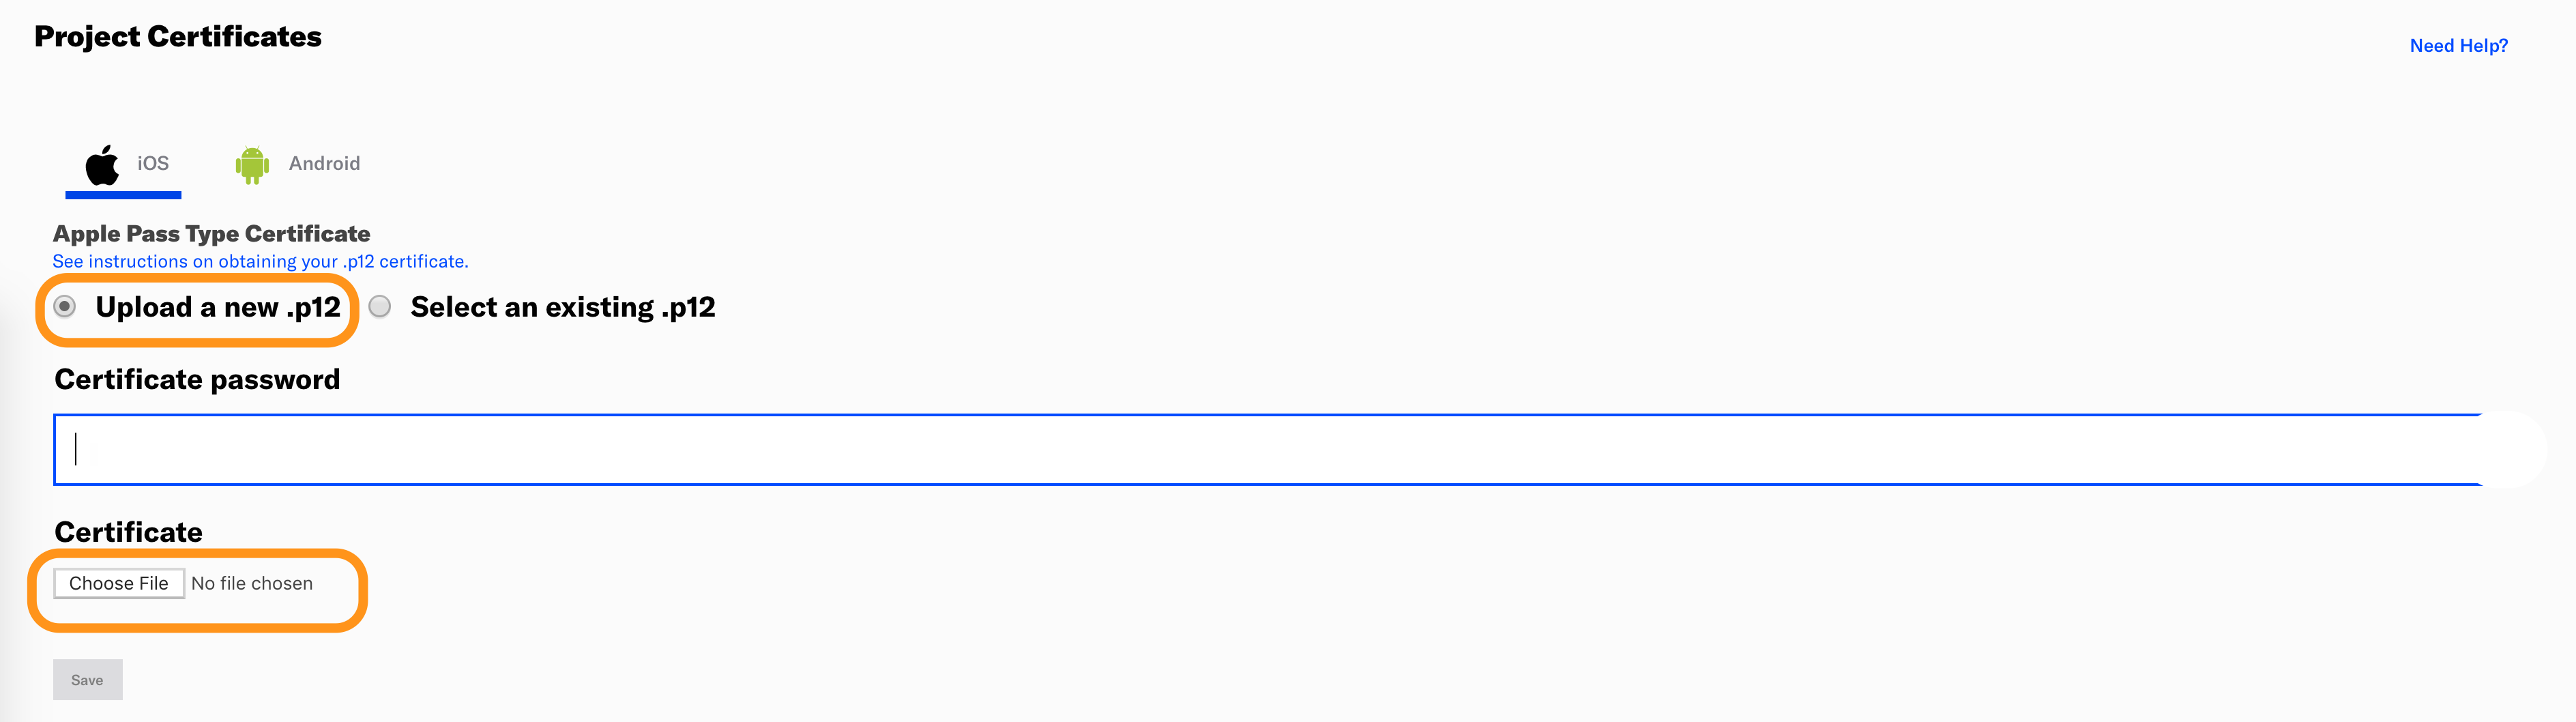
9. You should now be able to take this .p12 file and upload to your Airship Wallet Account. Select the project you want to add the certificate to then select the Settings > Certificates.
Related Content: